Saturday, April 26, 2008

Overlaying of toilet tiles completed!

Today we went to check the progress of the overlay and found that all the job have been completed! Very well done and very satisfied in the job. especially the common toilet tiles. Spend only half the price of the master toilet, but the effect turn out is pretty gd!!

The foyer area at the door step:

The foyer pebble-wash is done! awaiting for the homogeneous steps to complete:

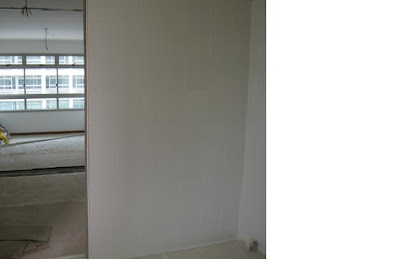
Kitchen wall patched nicely:

Bedroom 3 wall being patched back nicely:

The floor tiles are damaged after the hacking works for bedroom 3 wall for the replacement of the glass panel. Therefore, Lisa suggested to replace to pebble-wash to go along with the theme:

(Common Toilet)
The difference between HDB wall border and the mosaic border... It is also recommended by famous ID magazines that if owners dun wish to spend too much $ on overlaying of toilet wall tiles, hackin away the borders to replace with mosiac is a gd option. The left hand side we didnt change the border because it will b covered by the wall to wall mirror. So that area dun have to change since cannot b seen:

Completed version of Common toilet wall tiles... border hack and changed to 3 rolls of mosaic tiles, the wet area lay with dark grey/brown tiles and the dry area with pebble-wash:

Master bedroom toilet wall tiles, the area behind the toilet bowl:

Master bedroom toilet floor tiles. The mosaic tiles is used for the area under the vanity:

Monday will be the day to install aircon trunking and Lisa will arrange for the partition man to do some partitioning as well...
Hopefully carpentary and glass can arrive earlier coz we cant wait 2 move in... hehe!

Thursday, April 24, 2008

Foyer Pebble-wash in progress...


Today the tiler is doing the pebble-wash for our foyer tiles. we hack away partial of the foyer tiles to pebble-wash so that it gives a resort-feel...

For those who dunno wat i'm referring to... The pic below shows the pebbles being mixed together, with i tink, cement:

Then,
Work-in-progress:

Cant get in to see the overlaying progress of the toilet coz need to wait for this part of the foyer to dry... Gotta come back another day!

8th day of reno... 23rd Apr 2008...

Early in the morning, we went to check the progress again... Need to ensure the overlaying of toilet tiles are done before monday the aircon man can do the trunking and piping...


Common Toilet wet area tiles done:

Master bedroom toilet wall overlay half done. We choose a marble-like tile... They still need a few pieces more before the entire wall is done:


The thread for the fixed glass panel is done for bedroom 3:

The service yard washing machine and dryer base is up!

The kitchen wall tiles are done after the hollow wall is built up. Tiles 100% identical. Heng!


Tuesday, April 22, 2008

6th Day of Reno... 21st April 2008!

Lisa need to meet us 2dae to discuss some issues regarding out glass wall and the partition for the dining area... So we need to go down to our new home again!

A pic of the bedroom 3 floor tiles that are affected after the hacking of the wall... Will be replacing it will pebble wash:


20th April 2007... Fridge base is ready!

5th day of reno... For the past few days, we have been going to take pics of our the reno progress at night! so all the pictures are quite blur... 2dae, we went early in the morning!
The hollow block wall for kitchen wall... (clearer view):


2day, the fridge base is up! However, the tiles is slightly different with those given by HDB... Luckily, it is used as a fridge base. So it cannot be visually noticed...
The cute fridge base! Noticed there is a small gap on the left of the fridge base... It is the allowance for my kitchen sliding door...:


The kitchen cabinet base done:


My ID paste the layout plan of the things that needs to be done as a reference for the contractor and paste it on the kitchen wall:


Monday, April 21, 2008

4th Day of Reno, 19th April 2008...

More updates of the reno progress! Everyday is a new surprise... Our resort have became more dusty, more dirty and more messy! Haha...


The kitchen wall are being patched good after the hacking process and the rebuilding work:


Saw the workers doing the kitchen cabinet base and the fridge base:


The water proofing for the common toilet is done! The borders are hacked for the mosaic tiles:


3rd Day of Reno... 18th April 2008...

Yes, i agree we are rather kiasu coz we have been visiting the reno progress almost everyday! Haha... This is also to ensure that things are done correctly...

Hollow block built up at kitchen wall (extension):


Hmm... I think this is the water proofing for the master toilet floor tiles for overlay:

17th April 2008, Foyer tiles hacked!

I can say that the workers did their job realli fast. Just the 2nd day of reno, most of the things that needs to be removed are gone!

Foyer tiles hacked and removed... To replace with pebble wash:

16th April 2007... The official renovation start date!

Finally, our renovation begins! Hacking and electrical works commences and below shows some pics of how the process goes. Picture tells a million word...
The living room ceiling light electrical wiring:


The hacking of the kitchen wall coz we wanted to shift the door opening to the other end of the wall. This allows more space to park a dining table next to the kitchen wall:
The hacking of the master bedroom toilet vanity top, toilet bowl also removed:

The hacking of the common toilet bowl and vanity for overlaying of floor tiles:

The hacking of bedroom 3 wall to replace will tempered glass wall with sliding glass door:


Living room Tv feature wall electrical wiring:

Tiles Selection on 8th Apr 2008

After going through 4 Interior designer's quote, we have decided to sign with Wei-ken.com to doll up our home. Her name is Lisa Toh, senior designer of Wei-ken.com.

Got her through my sis-in-law's fren recommendation coz her condo was nicely done up. So far her quotation is reasonable and the materials she gave us was better than the rest of the IDs based on the prices. Therefore, after meeting her to slash prices 9 times, we decided to confirm with her and get our flat done up asap. Have been paying the S&C and water bills since January! So cant drag any longer... Hehe...

Below are the selection of our toilet tiles coz we wanted to overlay.

Common Toilet Theme = resort

Master Toilet Theme = hotel-style

The overlaying cost for 2 toilet is very ex! Therefore, we decided to only overlay the master toilet completely and only hack the common toilet border to the mosaic tiles as of below:
Common Toilet border tiles:

The master toilet wall tiles we will choose something more classy and closer to hotel-style as of below.
Master Toilet Wall tiles:


Then for the mater bedroom toilet floor tiles, it will be the dark grey tiles (below left) and common toilet wet-area will have the brown coloured tiles (below right). Specially for the common toilet, the dry area will be using the pebble-wash for the resort feel...

Key Collection Day 19th Dec 2007! Opening Ceremony, 23rd Dec 2007...

On 19th Dec 07, it was our key collection day. However, it wasnt the auspicious day for us to do the "opening ceremony". So we waited till 23rd Dec, "Dong Zhi", then we can officially open the door and do the ritual. Below are the pics of the pre-renovated home sweet home!


Living Room


Common Bathroom Shower


Common Bathroom Vanity


Bedroom 3 (nx to living room)


Bedroom 2


Master bedroom


Master bedroom
(wardrobe corner)


Kitchen


service yard


Master bedroom toilet vanity


master bedroom shower area


Master bedroom shower area window